Pages

Wednesday, February 27, 2013

Page and Video - Building Embellishment Groups


You know that commercial with the woman who says she needs to go shopping for some new shoes and the next thing you know she is climbing up that itty bitty rock way over the canyon?  My husband covers his eyes.  He can't understand why anyone would do that.  Well, I don't either.  I would never take up rock climbing.  On the other hand,  I do like to get a good view as long as I do it from dry land.  (I get seasick on a ferry.)

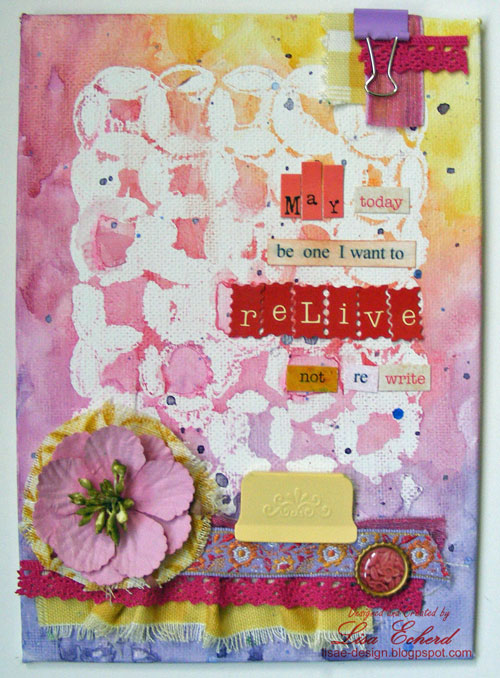
Here is the journaling for the page:


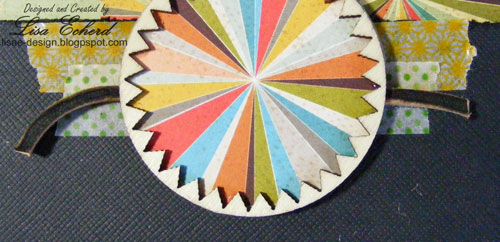
The video shares how I line up the text on the ledger lines.  I created the embellishment groupings from a Stampin' Up! stamp, wood veneer pieces, word stickers and a combo of ribbon and Washi.


In the video, I share my process for choosing the elements and layering.  My title ran a bit long so I used some smaller letter stickers and words where possible to finish it off.


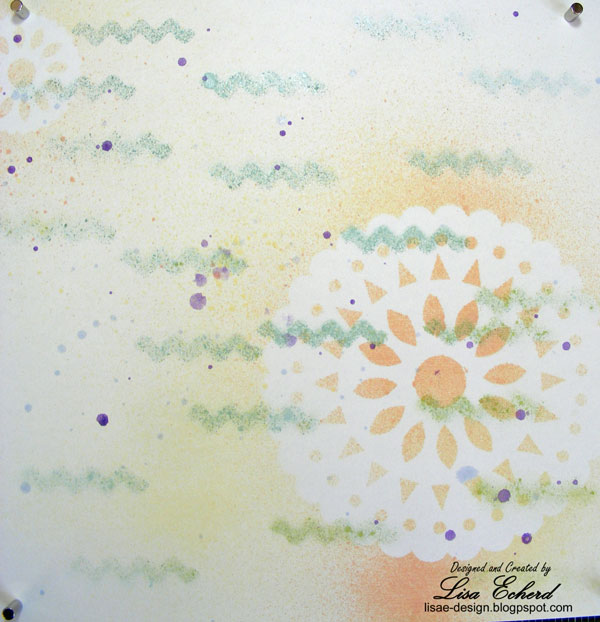
Some of the mist is a bit smeared.  It was actually a LOT worse.  At the end of the video you'll see my near disaster or what we'll call a Misting Mishap.  Fortunately there was a way to recover.  The lesson I learned was to blot with a paper towel, not a cloth and to put the mist bottle down when not in use!

With several things covered in the video, it is a longer on than usual.  After the sketch and paper selections, there is a screen that tells what minute each thing starts so you can jump ahead to embellishments or another part if you like.

Watch at YouTube:


Here is the PDF with the sketch and a few tips:  Page with Embellishment Groupings

Next week, I'll have a Project Life page for the last two weeks of February.

Thanks for visiting!

Tuesday, February 26, 2013

Rainbow Card


The circle portion of the Stampin' Up! Essentials Paper Piercing Pack is one that I could use with my punches as I have several circle punches.  However, I wanted to try something a little different since sewing is so popular right now.  I have two containers full of DMC embroidery floss left from the 70's and 80's when I did a lot of counted cross stitch.  It has come in handy on several papercrafting projects .

The first card I tried, I stitched across and back for this effect:


And the 2nd time through - the one in the video - I did this running stitch - although you don't run so fast on paper :-)


Which do you like better?  I thought I liked the first one best but seeing the card side by side, I think the running stitch makes the rainbow seem bigger.

For the bottom of the card, I've used an old Inkadinkado sentiment.  A St. Patrick's Day one would be perfect here.  The cardstock is Stampin' Up!'s new Gumball Green.

Here is the video at YouTube:


I've got one more of these paper piercing cards coming next week.  It is a dressier card and probably my favorite of the series.

Thanks for visiting today!

Monday, February 25, 2013

First Mixed Media Canvas


I've been wanting to try some mixed media on canvas for quite some time.  I took a short class in December, watched a video and then got busy on other things.  As I've been taking the Art Class at Two Peas, I became reinspired.

All of Wilna's class examples are scrapbook pages.  However, many of these techniques can be done on canvas - probably a lot of them originated there.  To dip my toe in, I bought some little 4x6 inch canvases that aren't stretched over wood but have a chipboard backing.  I created the one above as a stand alone piece but I could also adhere one to a scrapbook page.

The phrase for my piece came to me last week after visiting my financial adviser  As he walked me out, we were reminiscing about the good old '90's.  What a decade!  If I could live any time in my life over, it would be the 90's.  He was thinking of the good interest rates for investments, the long growth spell in the stock market and the reasonable unemployment rates.  I was thinking of those but also the happy times from my corporate career (I tend to forget the working weekends), the years of getting to know the man who became my husband, the vacations when we could go anywhere and do anything without complaining knees, hips and whatever, etc.  It was a wonderful time.  I wish I could relive it.

That doesn't mean that this isn't a wonderful time, too.  And this phrase came to me:

"May today be one I want to Relive, not rewrite."   May I look back on this day and want to do it all over again, just the same.

So I used some stickers and a few typed words to add this to my piece.  The background is a technique from class using art masking fluid and watercolors.  I'm in love with watercolors!  I certainly would have never known what art masking fluid was, much less have used it, if it weren't for class.


I like mixed media because it is very liberating.  Everything here is from my stash. Probably the newest thing is that flower that came in a kit last fall.  I also like that I can put things like the flower on there and not worry about it getting squished in my albums.

So this little piece is propped up in my bathroom window where I can see it while I'm brushing my teeth - starting and ending my day.  Will today be one I want to live again if I could?

Friday, February 22, 2013

The new bed


Hi!  I have a page today about somebody besides Lenny and me!  

Dillon is getting very tall and he got a surprise this Christmas.  Here's the journaling for this page:

“Go clean your room.”  Ah, man, that is not what you want to hear right before Christmas.  Dillon had been trying to guess what his gift would be.  He cleaned up his room and soon his dad was dissembling his bed.  Then they went over to the neighbors and carried a mattress over (the neighbors had been hiding it).  Dillon still didn’t know what was going on.  “It’s your new bed.”  Dillon was thrilled to graduate from a twin to a regular bed for Christmas.  He was even happier when his mom carried in a new TV for his room (though he did think it was for his dad, at first).  Grandma Jeannie gave him a new coverlet. The only drawback was cleaning his room and having to carry in his own mattress.  The price of growing up – and up and up.

For the page, I combined traditional elements like October Afternoon stickers and my homemade tags with a couple of techniques from Art Class.  I got the idea for the negative space lettering without filling in the middle of 'e's and 'o's - sooo much easier! - from Wilna.  I painted strips of acrylic paint in the red, blue and greens to go behind the letters.


The page is for the challenge to try some different kind of stitching techniques on a page.  I tried metallic threads.  I'm glad I gave it a go here and not on a sewing project.  I'm also glad Wilna says she "isn't in the perfect business" because this sure isn't perfect.  You can see that a lot of my stitching rows don't complete or they stop and restart.  My thread broke on every single row.  I finally had luck with a smoother metallic threat.  I've had this thread for years before I got this last sewing machine.  I was working on a Sunday so I couldn't call my sewing machine repair shop to see if they had suggestions - and I admit I still haven't called them.  I'd love to figure out why the metallic is breaking on my Pfaff machine when it sews everything else like a dream.


Anyway, it was a fun technique.  I also sewed various ribbons on a die cut Christmas tree for the embellishment.

I think the marriage of clean elements and artistic, handmade elements worked well.  Now if Jaime will just send me more pictures....

Thursday, February 21, 2013

4th Anniversary and *Winner*


Hi!  It's been 4 years since I started blogging.

I know that blogging isn't as 'hip' (or whatever the current word is) that it once was.  Clearly, I'm not that 'hip' either since I don't know the lingo. Perhaps some of you with teenagers can enlighten me.

Other social media has been getting the attention - Twitter, Pinterest (which I love, too), Instagram.  Facebook and YouTube have grown even more popular since I started blogging 4 years ago.  But blogs are still my favorite.  I love to post and to read your blog posts.

Blog are where you can really find out the details on a project, learn more about other people, benefit from other's experiences, and discover common ground.   I've found some value in Twitter but mostly it just tweets me off to other places with links.   Pinterest pictures may be worth 1000 words but I often find myself following the link to get the story behind the photo - how was the project made?  The photo doesn't usually tell you but the blog entry does.

So blogging is still a love of mine. Thank you for stopping by to read my posts and comment on the projects.  I could keep doing this even if know one visited but it is way more gratifying that you do!

And speaking of feedback, I have a winner for the giveaway.


The winner is...

** MSCONWAY2010 **


(MSConway, I've sent you a YouTube message.)

Thanks to all who left me feedback.  I appreciate all your kind comments and am always open to suggestions.  While I enjoy prattling on, I'd still like you to learn something here on the blog and my YouTube channel.

Speaking of YouTube and earlier Pinterest, I've added little buttons on the side for you to find my channel and boards easier.  

Also, I added pages for the blog along the top of the screen.  I have my favorite projects, popular videos and a bit about me.

Now for my card for today:  I've been playing a bit with ideas from the Art Class at 2P's before I use them on a layout.  For the card base, I used a homemade stencil and some gesso which is a new product to me.  It is like a thick white paint.  I then added some splatters of Heidi Swapp Amethyst mist and a homemade blue mist.

The flower was stamped with paint and then stamped again with gesso.  I used some of Wilna, our instructor's, style for creating the borders.

Thanks for visiting today and thank you again for all your feedback!

Tuesday, February 19, 2013

Valentine Page and Video


For Project Life, I concentrated on one day this week - Valentine's Day.  I think this is my favorite page of Project Life so far for 2013.  The photo of my husband and I came out blurry but I don't care.  We are very happy and that comes through to me.  Because that photo was blurry and so that I could use lots of pink and Valentine's colors, I turned all the photos black and white.

I don't buy a lot of holiday specific product. These are all older products, some of which I accumulated through giveaways.  BTW, if you haven't entered my giveaway, you have one more day. See this post for details.  The 'bloomers' trim is Webster's Pages.  I sprinkled in some rhinestones from Hobby Lobby's jewelry department.


The journaling is printed on a shimmery vellum and adhered over some flocked Fancy Pants transparency I've had forever.


Here is the journaling:

I got us tickets to a play and you volunteered to either take me out to dinner or to cook for me.  Cook, I picked!  Your chicken curry was delicious, but was no match for the beautiful poem you wrote.  Oh, no!  My mother read it and now she wants one for her birthday.  We shared memories from our scrapbook albums of 2012 and a rich chocolate dessert.  The perfect day – only next year I’ll let you pick the play!


One of the funny things was how unromantic the play I picked was. Our local theater company did a splendid job with the acting and it was well-written. It was about a man leaving his mentally ill wife for his downstairs neighbor.  To say it didn't end romantically is a major understatement.  So I told my husband we should so this again but next time I'm letting him choose the play.

The videos are in two parts. I've done a video on laying out the page as usual.  The photo collage is a separate video.  I used Photoshop Elements 9 and the Cricut to layout and cut my heart.  You could use other photo processing software or just arrange photos manually and then cut into a heart shape.  You could leave them as a rectangle.  There are lots of options.  I'm definitely not a PSE expert.  To tell the truth, it is probably the least favorite software of any I've ever used and that is saying something!  I can though mange to do the basics.

The main layout video at YouTube:


The Heart Collage at YouTube:


The page definitely makes me smile!  Thanks for stopping by today!

ETA:  Oops!  I forgot to attach the PDF for this video.  It goes over the heart collage part.
Valentine Page PDF

Monday, February 18, 2013

Paper Pierced Countryside Card and Video


\


Continuing on with using the Paper Piercing template for those of us who don't have all the dies and punches that go with it, I have this card.  A 1 1/2" x 3" square and two 3/4" circles fits perfectly into one of the styles of the Essentials Paper Piercing Pack from the main SU! catalog.  For my card, I used the Countryside stamp set and some Ranger Weathered Wood embossing powder to color the circle embellishments and recolor my brads to match.

The designer paper is left from one of the earlier cards.  It is from the MME Miss Caroline 6x6 pad.  I think I got this at Hobby Lobby or Michaels. I'm so happy they started carrying these paper pads.


Watch at YouTube


Tomorrow I'll have a new layout for you from Valentine's Day.  The giveaway is still open through Wednesday evening.  Check out this post for more details.  I'd love to hear your ideas for improving the videos and/or the blog.

Thanks for stopping by!

Saturday, February 16, 2013

What we like in Art


When we are looking for an outing close to home, my husband always suggests our local art museum.  Recently they had two new exhibits.  One was very realistic landscapes.  The other, contemporary art from the early 1900's.  After those we toured the permanent folk art exhibit again and I noticed something about what we are drawn to.

Here's the journaling for the page:


. . . . t e c h n i q u e . . . . c r e a t i v i t y . . . . r e a l i s m . . . .
Neither of us are schooled in art.  We just like what we like or admire what we admire.  The things that seem to make us go “Wow” are usually when it looks like it was really hard to do.  In the last photo on the right, Lenny hadn’t noticed this piece of the folk art exhibit much until I pointed out that I couldn’t see any joints in the metal tree.  It appeared to have been cut entirely from one piece of metal – all the leaves, even a little bird on a branch. That was impressive!  All of these photos were taken at the Hickory Museum of Art on a visit in January, 2013. The landscape caught Lenny’s attention because of the ‘bear’ shadow in the mountains and the story behind it.  The modern pieces by Will Henry Stevens interested me because of the texture and the way the colors changed even though the lines would continue. This reminded me of some art quilts.  I like art that inspires my creativity.  We enjoy visiting the gallery together.  


To create this page, I used a technique from the Art class at Two Peas taught by Wilna Furstenberg - wax.  When I saw "wax" as a chapter heading, I had no idea what kind of wax she was talking about - candle wax?  hair removal wax?  (now that would be interesting!)  None of these. There is a wax available at art supply stores she used for some of the projects and she also used crayons!  I'd never even thought about what crayons were made out of.  I'm probably the only person in this class who had to drive to town to buy crayons since I don't have children.  But I made that trip because once I saw this technique in action, I had to try it.


It was such fun melting the crayons and getting the color patterns.  I added several layers to mine really letting the colors run together.  The class example was on white paper and I decided to see if it would work on a dark background.  I"m delighted with how the colors pop.

The only challenge I've had is this is a bit brittle and I've broken off a couple of the 'drips' already. (I remelted one and glued back two more.) I'm going to pose that question on the message board to see if there is something we should be covering this with after using the crayons.  For now, my layout is in one of my shadow boxes so it won't get damaged.  Anyway, it was tons of fun.

If you'd like to have some fun with all kinds of mediums, the class is at Two Peas in a Bucket.  There are 10 chapters with a 20 minute or so video with each.  Each video shows multiple examples of each technique on 4 or 5 layouts.  There is a long PDF for the class.  Wilna is a joy to listen to.  Her explanations are clear and she is immensely creative.  The cost is $25 and this is a workshop so you go at your own pace.


The other embellishment on the page is in response to Glitter Girl's challenge for the week - wood veneer.  I passionately love wood veneer pieces so this was an easy one.  I had not used this set and I thought it fit in with the photos and the background paper from the Yearbook collection from Studio Calico.  The trim is some leather I bought at Wal-mart years ago.  They used to have the best trims.

Thanks for stopping by!  If you haven't already, be sure to enter my giveaway via this blog post or my YouTube channel.

Thursday, February 14, 2013

Cross My Heart card and **Giveaway**


Happy Valentine's Day!  I hope you get to spend time today with those you love.

My husband is cooking lunch for me!  Aren't I a lucky girl?  When he retired the first time around, he cooked often.  When he retired the 2nd time, he started spending more and more time on Pinball machines and never resumed cooking.  I'm really looking forward to today's treat.

Two other things on today's post... First, today's card uses Stampin' Up!'s Paper Piercing Pack from the main catalog as a basis for this stitched heart.  Here's the short video that shows how to create the heart:


Watch at YouTube


Also, I have a GIVEAWAY!  Later this month I'll celebrate a blog anniversary so I wanted to give a package of goodies to one lucky winner.  The prize consists of 1 pack (12 sheets) of designer paper from Stampin' Up!, 1 My Mind's Eye 6x6 pad, 3 packages of trim from SU! including my favorite pom pom fringe, 2 Prima stamp sets, some Washi, stickers, rub-ons, brads and Basic Grey chipboard letters.  Lots of goodies.


Here is how to enter:

1)  Leave a comment below and tell me one thing you like or one thing you would like to see improved here on the blog.  I'm truly looking for feedback so any constructive criticism is appreciated.

2) Watch the YouTube video that goes with this post (shown below) and comment on YouTube.  The video will tell you what to comment on.

and/or

3) Become a Twitter follower.  I've just started using Twitter and it seems that it works best if you follow lots of people and lots of people follow you.  The link to my Twitter account is on the right side of the screen.

Watch at YouTube


You can do one, two or all three for up to 3 chances to win the prize pack.  Giveaway ends next Wednesday, Feb 20 at midnight.

Thank you so much for visiting my blog and leaving feedback.  It means so much to read all your comments.  I truly do want to make sure everyone who visits gets something from my blog so I look forward to your feedback.

Happy Heart day to all!

Wednesday, February 13, 2013

Project Life page from a sketch challenge


This week's Project Life/Project 365 layout is using the sketch from Pamela's World of Scrap.  She has a contest open through the 15th to win a great prize pack if you make a page or card using her sketch.  The sketch has room for 8 photos and was absolutely perfect for Project Life.  I've used 7 photos and the remaining space for a journaling block.

In my video, I show her sketch.  I share a tip for managing so many photos while trying to figure out what papers you are going to use.  The 'pinball' embellishments were created with some chipboard and embossing powder.


There aren't many embellishments on this one. With so many fairly busy photos and a super long title, I think the simple page design works well.


The focus this week was on my husband's many activities around his pinball business.  All of these are here at home.  The next time I accompany him on a service call or to do a delivery, I want to get photos of those so I can do a more comprehensive look at what goes into pinball repair and sales. Sometimes he gets frustrated that he isn't getting as much done as he wants.  I don't think he realizes what all he does get done!


Here's the video at YouTube:


Since I didn't do the sketch myself, I didn't do a PDF this week.

Thanks for joining me.  Be sure and come back tomorrow.  I have a special treat for Valentine's Day!

Tuesday, February 12, 2013

The Stampin' Up! Paper Piercing Pack


When I got the 2012-13 Stampin' Up! catalog, the most must-have item was the Paper Piercing Pack.  It worked with several punches and also many of the dies for the Big Shot.  At the time, I was planning to buy the Big Shot but later changed my mind.  So I haven't really used the Paper Piercing Pack that much.

This weekend, I got it out and tried to find other ways to use this tool without all the dies and punches.  Here is one I found.  The scallop borders work perfectly with 1" and 1 1/2" circles.


I created the border for this card using My Mind's Eye Miss Caroline 6x6 pad and a 1" circle punch.  The video goes through this quick card.

Watch at YouTube


I've done a couple of other cards using the Paper Piercing Pack coming up in a few days.  Also later this week, there will be a giveaway post!

Thanks for watching!

Monday, February 11, 2013

Just Right


Just the right

distance from home... length of stay... vacations for us in 2013.

Typically we make one trip per year to someplace we have never been.  We had planned to go visit my friend in D.C. where we have visited several times and then drive on into Delaware which would have been new to both of us.  My sudden onset of sciatic problems stopped that.  We ended up traveling mostly within our own state plus our usual beach trip to S.C.

The trips were the perfect length in both distance and length of stay for us this year.   Things have a way of working out.

This page will be my last page of our travel album for the year.  I used a technique from my Art Class at Two Peas on the maps.  I used several layers of Modge Podge to adhere and finish the torn pieces of mostly NC and SC maps.  One layer had some white paint as our instructor Wilna had suggested as a way to tone down the color and soften the look.


Given the backdrop, I kept the rest of the layout simple finishing with some twine and clips from Basic Grey. This is one of those reasons I wanted to take this class - to do something a bit different with a traditional page.

I'm trying to get my 2012 albums - one for everyday stuff and one travel -  in order to show my husband for Valentine's Day.  He has seen many of the pages already, but not all.  It is nice to go through them together.  I won't have quite every page in there.  Since I started doing American Crafts albums rather than Creative Memories, I don't feel so pushed to have everything done.  It is easy to add some more pages later.

Do you add more pages to your albums later on or do a whole album before moving on to the next one?

Thanks for stopping by today!

Saturday, February 9, 2013

with you


For the first lesson in our (he)ART class at Two Peas in a Bucket, I did this layout which is going to the title page in our travel album this year.  I already had the photo and some of the supplies out when I heard about the class; it was perfect timing.

I'm taking this class for 3 reasons:
1 - Late last year I took a short class on mixed media from True Scrap and visited several galleries in a nearby city.  This left me really excited to do a few pieces for myself.  However, when I browse the art supply section of Hobby Lobby, I'm totally bewildered by all the choices.  How is gesso different from regular paint or modeling paste?  What kind of canvas do I need?  I end up leaving empty handed.  This class focuses on art for scrapbook pages.  I don't expect to learn everything about mixed media in one class but I'm already learning a lot.  The Gesso question has been answered already.

2 - I want to occasionally do pages like this one with one photo, no or limited journaling and lots of technique.  They are fun and I love seeing other people's work.  As I've said before, the white space intimidates me a bit.  However, you know my style is multi-photos, lots of journaling and big titles so...

3 - I want to add a little more artsy stuff to my regular pages.  My traditional style likely won't change that much.  Just want a little something to spice it up a bit.

So for this page, I created my own stencil using my Cricut.  (More on that coming up in a later post and video.)  Here is my stencil cut from an old sheet of 12x12 that I'd used for testing print placement:


In the class, Wilna shows us how to use a stencil with multiple inks.  I'd never tried this before.  My first effort turned out way too dark for the soft, early dawn look I wanted so I tried again and added a mask from the home stencil section of Michaels:


Since this is a title page, I wanted the year on it but didn't want it to overshadow the rest of the layout.  I placed '2012' in stickers on the lower part of the page and then sponged white paint over them. After removing the stickers, you can see the year lightly in the background:


Then I added my matted photo and lots of layers of Washi and trims. I kept trying brads and they were just too heavy.  So in the end, some heart shaped pearls won out.


'you' is stamped from Stampin' Up!'s Define Your Life set.  Most of my mask got covered up but you can see it a bit here above the photo.


The scallop embellishments are stamped on Vellum and embossed in white.  They were too stark so I flipped them over and used the reverse side.


This is the tiniest title I've ever done!  


So there is my first page.  I'm really pleased with it.  I didn't put the location or date on there.  We will certainly know it is Hilton Head and 2012.  The date really doesn't matter.  It is how we always feel at the beach.

Hope you are having a great crafty weekend!

Friday, February 8, 2013

Color and Sketch Challenge Card


Today I'm on opposite ends of the spectrum.  First I have this card which is for Splitcoaststampers weekly color and sketch challenges.  The color challenge is to use a neutral palette of black, ivory and Crumb Cake or kraft.  Now, there's a challenge for me!  I'm a color person so neutrals-only is tough.  The other part was the card needed to be clean and classy.

I think I made something similar to this in arrangement  not so long ago but I can't find a post about it.  Anyway, this is the Vintage Floral stamp set which is was last year's Sale-a-bration set.  This year's Sale-a-bration at Stampin' Up! is in progress now.  The background stamp is Lattice from Hero Arts.

For the opposite of a clean and simple card, I just signed up for the heART Class with Wilna Furstenberg over at Two Peas in a Bucket.  It's all about mists, masks, fabric, Washi and lots of messy, artsy stuff.   If my worktable could talk it would probably say I have a split personality.  I went from the structured, clean look of Stampin' Up! to a homemade mask and several spray bottles of mist in one afternoon.

It is one of the many joys of this hobby that it is so versatile and split personalities are welcome.  I'm still having fun with my first class layout so it will be up in a few days.  In the meantime, I'm still snapping photos of my husband for Project Life.  Just more crafty opportunities than I can keep up with.  If only I had two bodies to keep up with the two personalities...

Happy Friday!

Wednesday, February 6, 2013

Scrapping a "Typical Day" video


If you look closely at these photos and read the captions, you might think I'm having a really dull life right now.  Nope.  For me, January was bliss!  I don't think I've ever enjoyed the start of the year more.

Usually this time of year, I feel a let down from end of the holiday season, the short days, the cold weather and the interminable time it seems to be until spring.  This year though I've been very happy.  I've felt good.  I've also been spending a lot of time doing things I really want to do.  While I do still have some work and there have been plenty of doctor's visits for my parents and us (routine - no one is seriously ill, thankfully), I've had little to worry over.  It's been heavenly.

So this page may make me look rather boring, but I'm definitely not bored.

This is my Project Life page for the week as I took photos throughout the week picking up things that happen most every day.  It isn't everything in a day, for sure.  The hidden pocket has more details on my schedule and my thoughts about the month.  I plan to do a page like this on my husband soon. This week I'm taking photos of him and his pinball business a.k.a obsession.


The page features two popular scrapbook trends:  sunbursts and pie shapes.  I've been wanting to try sunbursts for awhile.  It is really easy to do and I included the measurements on the sketch.  It makes the sketch look complicated but it isn't at all.

Creating the pie shape was a bit more of a challenge.  I experimented with several ideas before landing on a couple I liked.  For the large pie, I've glued 4 2" squares  on a scrap piece of paper and the cut out a circle so that the squares form a pie with 4 pieces all the same size.  Then I added some additional pieces over it to create an "exploding" pie.

For the little pies, I just cut two circles the same size and punched a hole in the center.  Then I cut out a slice on one of the circles.  I layered them and added a brad.

The video also shows the pocket and goes through my process for selecting the right papers.

Here is the link to the pdf that contains the sketch shown below:  Scrapbook sketch and tips for Typical Day page.


Watch at YouTube:


So that's my PL page for this week.  Even if  you don't do Project Life, capturing a typical day can be enlightening. It would also be fun to do this every few years and see how your life changes and what stays the same.

Thanks for stopping by!
Related Posts Plugin for WordPress, Blogger...