Pages

Thursday, July 31, 2014

Pinterest CASEd Cards

While I love making scrapbook pages, sometimes I just need a change of pace.  Cardmaking provides the perfect opportunity to play and not fret it something doesn't work out just right.  Last week, I was looking for those advantages and also to draw on someone else's creative juices.  So I browsed my Pinterest Cards board and found these two that I wanted to CASE.


The first is from Frilly and Funky blog.  I did lots of layers using different mediums and stencils but with a very similar design in mind.  For my top layer, I used light modeling paste colored with some red shimmer paint.  I was hoping it would end up shimmery but I don't think there was enough of the paint to get that effect.  The flower is stamped with an American Crafts set.  Now that I look at her card again for the link, I wish I had remembered the black shading and the 3D flower.  Oh, well, I'll just have to do this one again sometime.

Next month, I'll be sending a 50th birthday card off in the mail.  This idea came from Cheiron Brandon. This was a good chance to use a bit of Washi as she did.  I added some score lines. I like the dimension achieved here without the bulk, easy for mailing.  It is also a very clean finish for a guy card.  It is nice to have a go-to card for those big birthdays.


I'm going to be using this as inspiration for a scrapbook page with Thickers so stay tuned for that video in  few days.  It will have more on cutting the numbers with the Silhouette.

Pinterest is so wonderful.  I don't have any idea how they make money on it since I've yet to see any ads but I'm just happy it is there.

Thanks for stopping by!

Tuesday, July 29, 2014

Pre-retirement for Thickers


I do love my Thickers.  Even with the Cricut and now the Silhouette, I still love Thickers for titles.  Some packs have been nearly loved to death as there are few left.  Letters like A, E, R and T seem to be the first to go and I'm left with lots of Q's, X's and tons of numbers.  I hardly ever use the numbers.

So before moving some of the old sets out of my stash (so I can buy new ones, of course), I want to use up a few of these extra letters.

The title for this layout 'Playground' comes from the odd letters of 5 different sets.  These are not all American Crafts Thickers.  I use the name "Thickers" generically.  Some of these are chipboard stickers from other companies.  And the same idea could apply to stickers, too.


The grid page has 6 photos of my husband and his youngest daughter taking her children to the playground.  I didn't remember until I got nearly done that this was actually July 4.  I'm sure that is why she had her daughter dressed in a pretty red dress.  Still I have a lot of red on the page and many other cheerful colors from Mon Ami by BasicGrey.  One of the larger papers is from Carta Bella's Celebration collection which is a perfect match.


The background has some zig zag stitching to finish it off. The little wagon was cut on the Silhouette.  A couple of stickers and some wood hearts complete the page.

The photo of my husband with his granddaughter is a selfie.  Didn't he do a good job?  I thought for sure Amanda took it, but he did.  He said the little one got a bit heavy but he doesn't look like he minds carrying her :-)

Here is the process video:


And the sketch. If you like the sketches, all of 2013 sketches are in one PDF here.


I mentioned in the last newsletter update that August would be the month of Thickers.  I'm getting a bit of an early start.  More videos will be coming along with ways to work through the extras in my Thicker stash.  So if you have more Thickers or Stickers than you know what to do with, I hope you'll join in.

Sunday, July 27, 2014

Giveaway winner

Thank you all so much for your fabulous comments on the giveaway post.  I'm so glad you enjoy the blog and the videos.  I have more in the works including a new class I will announce sometime in August.

You can also get an exclusive video by subscribing to my newsletter on the sidebar.  I e-mail once, maybe twice a month with a bit of news, a tip or two and a video.  It's free!

And now onto the giveaway...

Random.org picked the summer giveaway as the very last commenter just under the wire at 11:30 last night....

Melitta Ball


Melitta, send me an e-mail at lynnelisa@bellsouth.net with your mailing info and I'll get the gift pack right out to you.  (Response must be received by next Saturday, August 2.)

Thank you to everyone who participated.  More videos and posts coming along.

Friday, July 25, 2014

A collaborative effort


It's a bit embarrassing for someone who used to help others pick out things for their house and even hang pictures for customers to have empty walls.  But I do, or I did.

A few years ago I redid our master bath including new wallpaper, but I never got around to putting anything on the walls.  Other than a framed mirror over the sink, the walls were completely bare.

While my husband was visiting his family, I did the background for a new canvas for the bath and got stuck on the saying.  I wanted something short from nature to go with the leaves.  Since my husband will see this as much as I do, I thought I'd get his input.

When he came home, I picked out several nature quotes I found on Pinterest.  But even before I got to them, he came out with this:

Cathedrals are where you find them.

Perfect for us as we find nature as beautiful as anything we humans can create.  OK, I guess there is a bit of irony there as I'm creating something nature inspired but anyway, it works for us.

My intent with the background was to be very neutral.  Ha!  I just can't do neutral.  I started with misted book paper and dress patterns and then added paint - a lot of paint.  It has more color than I planned but I think it is my favorite one so far. I like it so much I was tempted to just put it up without a quote or leaves but then went forward with the design.

With so much color in the background, I did the leaves mostly red to help them stand out. They are a layer of chipboard and a layer of pattern paper cut on the Silhouette and then Mod Podged and painted.


The tree branch is actually from our magnolia tree.  It was just lying there on the ground nice and handy only needing a bit of trimming.


So now the walls are not bare.  We have some cheerful color to greet us each morning.

Wednesday, July 23, 2014

Silhouette Studio Grid

Edited 2021:  Apparently I can no longer share the file in the same way as I have for many years which had it open to everyone and did not require that I field individual requests.  I am leaving this post as an idea for creating your own grid.  It is easy to do. I took down the video on YouTube.  Please do not request that I individually share the file.

I do love my new Silhouette Cameo.  It cuts so precisely and there are tons of great images to choose from in the Silhouette store.  The software has tons of features.  There is one thing missing though that has had me wondering from the beginning.  Why?

There are no indications on the Studio software for measurements.  I want to match up where my elements are to cut with where the paper is on the mat as I often use several small pieces of papers and cut several items at the same time.  There are marks on the actual cutting mat but not the one on the screen.

I understand the designer addition has a ruler but I don't want to upgrade at this time.  I'm using the free software anyone can download from the Silhouette site.

So I created my own grid markings. The numbers are in a Studio file.  They will not print or cut on the Cameo.  They are just to help us see where we are on the mat.  Here is what the file looks like when loaded.


Tuesday, July 22, 2014

Summer Goodie Giveaway

I have a pack of scrapbooking goodness for one lucky randomly drawn blog commenter.  Leave a comment on this post for a chance to win the prize pack in this video:

Watch at YouTube:


Comments must be left on this blog post. YouTube comments don't count as there is some sort of scam being perpetuated on YouTube giveaways.  So check back here to see if you won.  I'll attempt to e-mail the winner if I can find an e-mail address.  Regardless, the winner's name will appear here on Sunday, July 27.  (The winner will have one week to get in touch with me.)

Comments must be in by midnight ET July 26 - this Saturday.  International entries are welcome.

Thank you all for your support of my classes, e-books and all your lovely comments on my videos and posts.  I appreciate the scrapbooking/cardmaking community so much!

Saturday, July 19, 2014

Pinwheel Background (video)


We see little changes each year to our favorite vacation spot - Hilton Head Island.  Stores open or close.  A new restaurant is a hot ticket.  They pave more bicycle trails.  I captured some of these this year including one we question.  They are adding a guard checkpoint just off the highway to where we stay.  The normal checkpoints are about a mile in.  This one is sure to back up traffic leaving us scratching our head at the idea.  Anyway, we love the new bike paths.

For the background of this page, I used a pinwheel pattern.  I thought I'd like to turn the photos on their edge a little and this led me to the triangles and finally the pinwheel design.  It's really easy to do as shown in the video and it really uses a lot of patterns from a 6x6 pad.


The papers are My Mind's Eye Collectible and match the papers from the bicycle page I did a few days ago.  The word Changes was cut on the Silhouette.  "Coming" is from a Simple Stories Sticker sheet.  I got in a few more of those stickers in my quest to work through some stash.  I'd better get busy as there is new stuff being released already and you know I'll want some new papers :-)

Video at YouTube:


Here's the sketch for the page:


Coming up this week, I have a summer giveaway here on the blog so be sure to check back midweek for your chance to enter.

Friday, July 18, 2014

What's new this fall?

CHA, Craft and Hobby Association, traditionally did both a summer and winter trade show.  It was at this show that all the new scrapbooking goodies were unveiled.  However, they have paired down to one show per year in January.

So how do we find out about the new stuff coming out for fall?

Here is what I'm doing.  ACherryOnTop.com (ACOT) which sells scrapbooking supplies has a preorder option.  So you can see many of the new products coming up via their website.  I'm not personally interested in preordering but I can get a peek at what I'd like to have.  Their regular newsletter gives you an idea of when each of the companies' releases will be coming out.  This is not a complete list of everything coming but gives you some idea.

ACOT has also started doing some product videos.   They are very well done with lots of closeups.  I used to love the CHA ones from Two Peas and I'm glad someone is picking this up.

Here is a link to their YouTube channel.

I've had a busy week and haven't had a chance to look at all the new lines that are buzzing on message boards but I'm hoping to get to that this weekend.  The best part of shopping for me is browsing and planning what I might use for what.  Looking is free.

While I'm still working through my stash, I know I'll want a little influx of new items as we get closer to fall.

Thursday, July 17, 2014

Test Post for Studio File

Just a test post to see if I can make this file available for download

Grid Markings for Silhouette Studio

See this accompanying video for how to use the file.

Tuesday, July 15, 2014

See the Alligator?


Alligators are common sights on Hilton Head Island and I guess in all of the Low Country.  They crawl out of the lagoons and sun themselves on the bank.  We give them plenty of room.  It's a big island, lots of space for man and beast - especially one that can run faster than me and has way more teeth!

In the video, I refer sometimes to the alligator as a crocodile.  I do know the difference but I still get it mixed up in saying.  When we were in Australia years ago, we had the best time one day on a tour of the rain forest with our own guide.  The other couple, unknown to us, who had booked the guide backed out at the last minute so we got to ask as many questions as we liked and take our time.  Lenny loved that day more than any and that is saying something in such a beautiful and interesting country.

The only part I didn't love, other than parking in Melbourne, was when we were out on this boat in the rain forest trying to spot a croc.  The mosquitoes had certainly spotted us and I was their lunch. The guide and Lenny saw a crocodile in the tall grass near the bank and pointed it out to me.

Finally I said, "Oh, there he isn't, isn't that something?" They were satisfied but I didn't see that crocodile anymore than anything.  I just wanted to get off that boat and away from those mosquitoes.

Later on when we got our pictures back, I was going through them and found one with tall grass and asked Lenny about it.

"Oh, there is the crocodile peeking through the grass.  Remember?"

"Sure, honey, whatever you say."

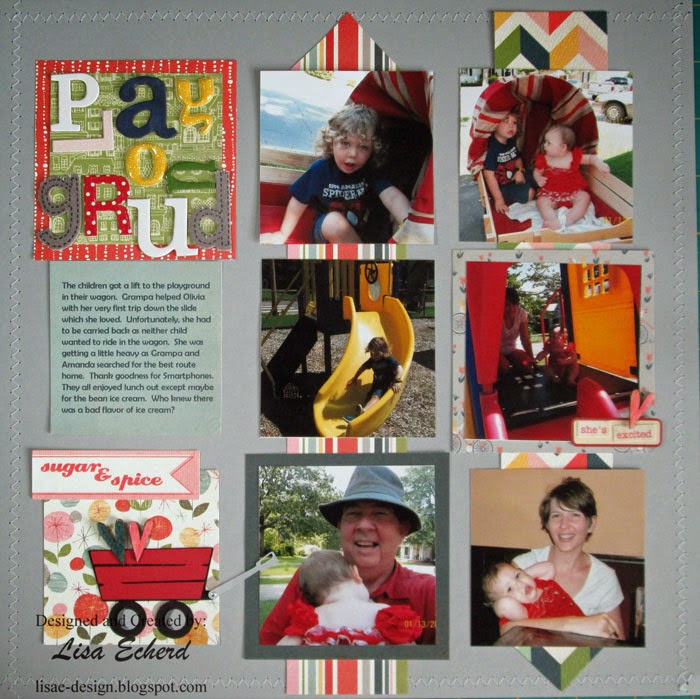
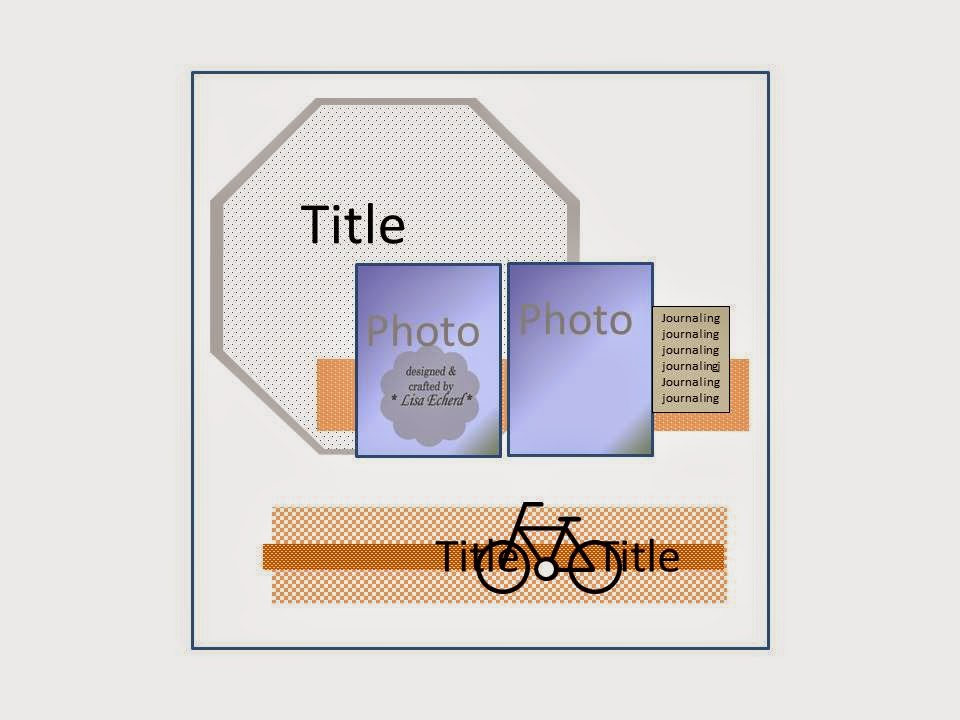
For the page, I wanted to emphasize the 'Stop and Look' theme as we were stopped when biking into this particular condo development.  I thought we would be told not to enter though we have biked through there before.  Instead he resident was just pointing out the alligator knowing we tourist like to get a photo.


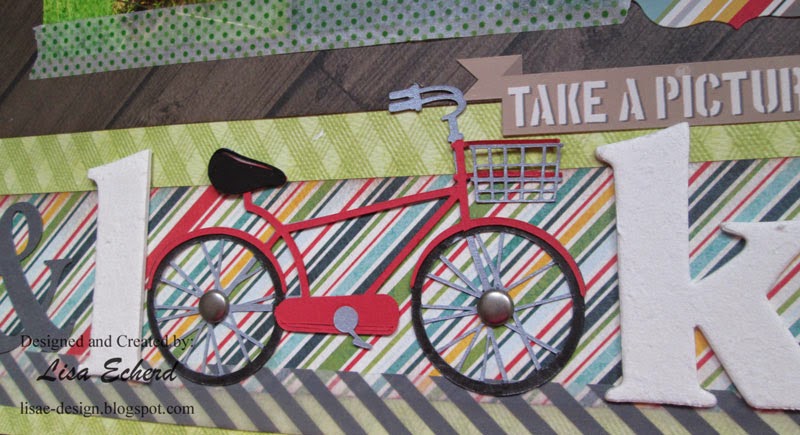
For "Look,"  I used a Silhouette cut bicycle for the 'oo'.  I picked a pretty detailed bike but the machine cut it like a charm.  I'm still getting the hang of assembling things or rather figuring out what pieces go where when I'm cutting things.  I cut the main part of the bike from Stampin' Up!'s silver cardstock.  I LOVE their silver and gold cardstock.  It is so pretty and not the least bit delicate.  You can use it just like any other cardstock.  Look how the Silhouette even cut out the bicycle basket. Amazing!

Here's the process video:


And here's the sketch:

The July newsletter went out yesterday.  Did you receive yours with the exclusive video on craft paint?  Sign up on the sidebar.  I usually do one resend later in the month.

Thanks for stopping by today!

Saturday, July 12, 2014

2 Pager with Spice Market


I used to be a BasicGrey girl.  Then for a couple of years, I bought very little.  The collections just didn't speak to me and they weren't colors I used.  Well, they are back!  This past year, I've loved everything BasicGrey made and bought some of just about every collection from January's CHA.

For this page, I used quite a bit of Spice Market.  I didn't have a gold paper I wanted to use for the mat but found one from last fall's Persimmon collection that worked perfectly.  The paper cutting had to get a bit creative to stretch single papers across the two pages.

I cover several techniques for this in my Two Page Terrific class - a self-paced class.  More info here.


This collection came with some delicate metal cutouts.  The red one balances all the detail on the right hand page.  I chose the black background because it is one of my Mother's favorite colors and the layout is about her birthday.  The dark color seems to help create balance on the left hand page, I think.


More details on putting this page together are in the Process Video:


And here is the sketch:


Thanks for stopping by!  My July newsletter will go out early in the week.  Signup is on the sidebar.

Also, Kerri Bradford's free Scrapinar on die cuts is Monday evening.  Signup here.

Thursday, July 10, 2014

Mist and Perfect Pearls Techniques

On one of my layouts earlier in the year, I experimented with mists and perfect pearls and was really pleased with the results.  The technique was part of a larger process video but I liked it so much I thought it deserved its own video.

All you need are a bottle of any spray mist, water and a little of Ranger's Perfect Pearls.  This is a great way to get more out of Perfect Pearls if you already have them.  I think all the craft stores now carry them in the scrapbooking section.  They usually come in some color groupings.  I like the white or ivory and the pewter and gold the most.

Also I wanted to remind you about the July Scrapinar coming up on Monday.  Kerri Bradford is going to help us get more out of die cuts.  I'm really excited about this one!  Here is how to register for he free event.


And I noticed that Lain has a new event she promoted on her blog called Jet Energy Pack.  It's a 5 week course on getting motivated. Just learned of this yesterday and I wanted to pass it along as the discount of $20 off (corrected from 20% off as originally posted here) is good through the 18th.  Use code BLAST.  Lain is definitely a every motivational person!


Thanks for stopping by today!

Tuesday, July 8, 2014

Layering and Outline Letters


This is one of my favorite pages this summer and the title isn't entirely true.

We like the Sea Shack.  Love it?  Well, I loved my lunch this year.  It's good.  I just don't love fried fish all that much.  Sometimes I have a craving. Lenny picked the Sea Shack this year.  The love title came from the Love Shack song which kept running through my head every time I worked on this page.

I used the page to talk a little about this restaurant and to catalog the other places we ate on the trip.  Hilton Head has over 300 restaurants according to Trip Advisor!  This includes fast food and coffee shops but there are many, many independently owned places on the island.  After over 20 years, I was amazed that we had never been to more than 1 of the top 10.  Our picks rank in the 30's and 40's and we thought they were great places.  So we have lots more to explore in coming trips.


Anyway, I do love the page because it uses one of my favorite paper pads from last year - Crate Paper's The Pier. I've been hoarding this and in keeping with this summer's theme, I'm putting it to good use.  Also, I really LOVE how the title came out on the Silhouette.


Now there may be other ways to do outline letters on the Silhoeutte.  I'm new to the machine so I don't know.  This is how I did mine.

1.  I typed my text "Sea Shack" and picked the font I wanted which is AR Christy.  That must have come with Windows 8 as it is new to me.
2.  Then I adjusted the spacing between the letters.  This is the Character Spacing option on the Text Style box that comes up when typing.
3.  Using the Offset window, I added the default .125" offset which creates a shadow around the letters.  Normally this is way too much offset for me.  Also this creates a separate layer so I usually move the offset letters away from the regular letters and cut them with two different pieces of paper.
In this case, I just left everything where it was and cut.

The machine cuts the outside and the inside of the letters leaving you with an outline.  You could adjust the amount of offset to get a thicker or thinner outline.  Step 2 is necessary so the letters don't overlap and you end up with letters all cut together.

This is all in the process video at YouTube:


I didn't create a sketch for this one ahead of time as I was just playing with the design as I went.  Another fun thing on the page are the vellum die cuts.  They are also Crate Paper but this year's Maggie Holmes line.

If you like sketches, the sketchbook for 2013 is still available here.  If you like 6x6 paper pads, the Scrapinar I did last year is found via the link in my sidebar.  We explored lots of different pages in the hour long Scrapinar.  

Thanks for visiting!

Saturday, July 5, 2014

The Hidden Treasures of the Craft Stores


Do you make a beeline for the Scrapbooking aisles at Michaels or Hobby Lobby?  I could probably find the scrapbooking aisle of Hobby Lobby blindfolded.

Yet, many of my favorite scrapbooking products are found in other departments.  I put together a little video of 10 favorites from the craft stores that are not found in the scrapbooking department.  You can find goodies in jewelry, fabric, art and general crafting.

What are your favorites to shop for at Michaels, JoAnns or other stores?  How do you use your 40% off coupon?  On this holiday weekend, there are sure to be sales.

I know this summer we are talking about using our stash. Some of these items may already be in your stash for other types of craft projects.  I love it when I can repurpose products I bought for some now abandoned crafting project for my scrapbooking.  These are also super inexpensive so they won't hardly make a dent in your crafting budget.

Watch at YouTube:


Be sure to sign up for the newsletter if you haven't already.  The July issue will feature 5 ways to use one of these little treasures on your pages.  (I'm resending June to new subscribers on Monday.)

Thanks for visiting today!

Thursday, July 3, 2014

"What a mess!" and July Scrapinar - Die Cutting


A few years ago we remodeled our kitchen.  If you have even been through that, you know it is not a fun process.  

The day before the contractor was coming was my mother's birthday and as usual, she wanted to go to Charlotte - about 60 miles away - for a meal and shopping.  It turned out to be an unusually warm day in March.  When we got home, my husband and I immediately started moving the last thing out of the kitchen we had to move ourselves - the refrigerator. I'd already prepared a spot in our sunroom and knew the plug in would work fine.  Lenny put down ramps at the doorway.  Everything was set.

Since we only had to go out the kitchen door, across the garage floor and patio and into the back of the sunroom, I just emptied everything out of the frig onto the counters.  Then we discovered that refrigerator wouldn't fit through the kitchen door!

I was here when it was delivered and I swear they came in through that door.  My Dh wanted to take the doors off the frig but I had no idea how to do that and how much time it would take.  Meanwhile there was ice cream melting on the counter and we were also getting hotter by the minute.  Finally, we decided to go out the double doors in the back of the dining room which was the same short distance.  We just had to move the dining room table and chairs somewhere, anywhere, to make room.

In the midst of all this, my mother showed up.  What did she say?  "What a mess!"  And it got a lot hotter after that, I tell you.

I am often reminded of this when I'm crafting.  I can make a mess and the one really good thing about having a craft room upstairs is that seldom does anybody see it but me.

My mess in this photo was last weekend as I started a mini album project. I'm filming it but it may be awhile before you see it.  It is taking some time. In the meantime, I've packed things up and started on some new pages.  There is also an event I'd like to tell you about.  I so appreciate all the wonderful feedback from June's Scrapinar.  I'm sure you will want to attend the July one hosted by Lain with Kerri Bradford as her presenter.


The description promises techniques for any type of electronic or manual die cutting.  Being new to the Silhouette, I'm particularly looking forward to this event.

As always, these are free, last about an hour and have a replay for a few days following the event.  The web room works best if you sign on with Internet Explorer rather than Chrome.  Also, click on the link you receive for the event well in advance and follow the prompt to be sure your computer has the latest version of Quicktime and the other players.  

Here is how to sign up for this free event:

Thanks for stopping by today!

Tuesday, July 1, 2014

For his Service - Sketch and Video


In April, our family gathered to celebrate my uncle's World War II military service. This seemed like the perfect page to share on this week of national holidays.  His wife is my Dad's sister.  She has told me stories of her husband's time in service and how she lived in California for awhile when he was stationed there and where she lived and worked locally waiting on her husband to return home.  They married in early February 1942 just before he shipped out.  He left the Army Air Corps in 1949 thus the 65th anniversary of his service.

Fred is now 98 and still quite 'with it.'  The wheelchair is mainly for getting out. At home I think he can still get around without it.  And he certainly doesn't look his age. Whatever 98 is supposed to look like, this isn't it.

I'm not a particularly good photographer so whenever I take a decent photo, I'm inordinately proud.  I really like this one of him with the flowers in the foreground.  Also on the page are photos of Fred's grandson who is still in the military and his young daughter the real star of the evening.  Most of us were meeting her for the first time and she is a charmer - when she was still - which wasn't often.  Her dad tells me she is fearless so perhaps she will be the 4th generation of the family to serve who knows.

Anyway, for the page, I used some patriotic stickers from Echo Park.  I'm not a big sticker person, but in the spirit of using our stash this summer, I thought I'd try doing a page with a lot of stickers that didn't look overdone.  I hope it worked.  There are 5 major stickers from the sheet on the page and a couple of small stars.

To balance the stickers I have some plain wood veneer pieces and a lot of neutral cardstock.  Oh, where would I be without my cardstock!

This page has a new sketch and a process video:


Video at YouTube:


Thanks to all who attended the Scrapinar last night or who are catching the replay this week.  I had a lot of fun putting together my presentation.  I appreciate all your kind words.

If you are new here, check out this post with links to my YouTube channel, ebooks and classes:  Welcome post.

Hope you have a Happy Canada Day and Independence Day!


Related Posts Plugin for WordPress, Blogger...